Monday, April 2, 2012

Sunday, October 3, 2010
WebQuest- Blek's Stencil Graffiti
Blek le Rat is considered by some to be the originator of stencil graffiti art. Stencil graffiti makes use of paper, cardboard, or other media to create an image or text that is easily reproducible. The design is cut out of the selected medium and the image is transferred to a surface through spray paint or roll-on paint.
Blek le Rat’s main motivation is the social consciousness and the desire to bring art to the people. He began his artwork in Paris in 1981 and he’s made a great impact on today’s graffiti movement.
 First Rats in Paris
Original Stencil Pioneer
He began decorating the streets of Paris in 1981 with a rat stencil in hopes of invading the streets with rats. He was inspired to create this stencil after seeing the graffiti in New York City in the 70’s. However, he did not want to copy the American style of graffiti. He wanted to generate a style that was fitting to Paris and so he chose the stencil. After the rats, he moved onto life sized portraits.
 Man Who Walks Through Walls
Task
Students will create their own self-portrait from a photograph using the stencil graffiti technique. However, they will be producing their art on paper and roll-on paint rather than using public buildings and spray paint.
How to create a stencil
How to create a stencil from a photograph using Photoshop Space Cowboy
Process
Review these websites:
Pioneer of Street Art
Blek le Rat for SALE (notice how he works on paper now)
Questions for discussion:
Do you think Blek’s art is art? Why?
Do you think it’s wrong to paint on public buildings to make a statement, or do you feel it’s a freedom of expression?
 Checkpoint Charlie
Project- Self-portrait Stencil
Take a picture of yourself and load it into Photoshop to create your stencil.
Follow the Photoshop directions
Gather the materials needed to cut out your stencil
i.e. scissors, exacto knife, cutting pad, image, and paper to cut stencil out of
After cutting stencil out, tape it onto your sheet of paper.
Gather materials to roll-on the paint
i.e. small roller and acrylic paint (one color), and dish to put paint into and roll on
Roll paint over stencil.
Set aside to dry.
Evaluation
Each student will be assessed on:
- Completed assignment
- Craftsmanship with stenciling
- Showed effort
Conclusion
This WebQuest is to provide a better understanding in the navigation of the internet for research. It has given you background knowledge in Stencil Graffiti and the artist Blek le Rat. It has also given you the experience of creating an image in the style of Blek.
Sources
Art Republic
Official website of Blek le Rat
Artnet
No Walls Gallery
Molotow Blog
Blek le Rat’s main motivation is the social consciousness and the desire to bring art to the people. He began his artwork in Paris in 1981 and he’s made a great impact on today’s graffiti movement.
 First Rats in Paris
Original Stencil Pioneer
He began decorating the streets of Paris in 1981 with a rat stencil in hopes of invading the streets with rats. He was inspired to create this stencil after seeing the graffiti in New York City in the 70’s. However, he did not want to copy the American style of graffiti. He wanted to generate a style that was fitting to Paris and so he chose the stencil. After the rats, he moved onto life sized portraits.
 Man Who Walks Through Walls
Task
Students will create their own self-portrait from a photograph using the stencil graffiti technique. However, they will be producing their art on paper and roll-on paint rather than using public buildings and spray paint.
How to create a stencil
How to create a stencil from a photograph using Photoshop
 Space Cowboy
Process
Review these websites:
Pioneer of Street Art
Blek le Rat for SALE (notice how he works on paper now)
Questions for discussion:
Do you think Blek’s art is art? Why?
Do you think it’s wrong to paint on public buildings to make a statement, or do you feel it’s a freedom of expression?
 Checkpoint Charlie
Project- Self-portrait Stencil
Take a picture of yourself and load it into Photoshop to create your stencil.
Follow the Photoshop directions
Gather the materials needed to cut out your stencil
i.e. scissors, exacto knife, cutting pad, image, and paper to cut stencil out of
After cutting stencil out, tape it onto your sheet of paper.
Gather materials to roll-on the paint
i.e. small roller and acrylic paint (one color), and dish to put paint into and roll on
Roll paint over stencil.
Set aside to dry.
Evaluation
Each student will be assessed on:
- Completed assignment
- Craftsmanship with stenciling
- Showed effort
Conclusion
This WebQuest is to provide a better understanding in the navigation of the internet for research. It has given you background knowledge in Stencil Graffiti and the artist Blek le Rat. It has also given you the experience of creating an image in the style of Blek.
Sources
Art Republic
Official website of Blek le Rat
Artnet
No Walls Gallery
Molotow Blog
Instructional Resource
Salvador Dali and Surrealism
By Rebecca D’Angeli

The Three Sphinxes of Bikini, Salvador Dali (1947)
Grade Level: 7th to 9th grade
Objectives
Students will:
o Learn and discuss surrealism and its characteristics.
o Observe and research Salvador Dali and his paintings.
o Write a paragraph on a dream or idea that will inspire a studio activity.
o Create a collage inspired by Salvador Dali and the subject of the written exercise.
Surrealistic artwork consists of realistic and irrational elements that describe dreamlike fantasies. This style uses visual imagery from the subconscious mind to create art without the intention of logical comprehensibility (White, 2005). In this instructional resource, students will be introduced to Surrealism and the artist Salvador Dali.
Surrealism as a movement:
Surrealism was a literary movement that began in the early 1920’s and experimented with a new way of expression called automatism (Voorhies, 2000). Automatism was used to seek the imagination of the subconscious mind (Voorhies, 2000). The movement officially began with the publication of the Manifesto of Surrealism by poet and critic Andre Breton (1896-1966) (Voorhies, 2000). Breton and other men where influenced by the psychological theories of Sigmund Freud and the political views of Karl Marx (Voorhies, 2000).
Using Freudian methods of free association, their poetry and ideas touched upon the private world of the mind, which was restricted by reason and social limitations, to produce surprising imagery (Voorhies, 2000). Surrealism followed Dadaism that also disregarded tradition.

The Persistence of Memory, Salvador Dali (1931)
Surrealist artist:
Salvador Dali (1904-1989)
Salvador Dali was a Spanish painter who used strange dream imagery to create unusual landscapes of his inner mind. He passed through phases of Cubism, Futurism, and Metaphysical painting before joining the Surrealist artists in 1929 (Thomas, 1998).
He was seen as strange and eccentric and claimed it was the source of his creative energy. For example, he arrived at the opening of the London Surrealist exhibition in a diving suit (Thomas, 1998).
Dali described his images as a painting of a photograph of a dream. He also used certain recurring images such as the human figure with drawers, burning giraffes, and bent watches that flowed as if dripping like water.
In 1937, Dali traveled to Italy and took on a more traditional style of painting. His new style and his political views led Breton to expel him from the Surrealist group (Thomas, 1998). He moved to the United States in 1940 and remained there until 1948 (White, 2005). While in the United States, he spent most of his time publicly promoting himself and his work (White, 2005).
Dali did not limit himself to a certain media (White, 2005). Along with painting he sculpted, illustrated books, designed jewelry, and worked for theatres. He also made the first surrealist films with director Luis Bunuel called Un chien Andalou (1929) and L’Age d’or (1930), as well as a dream sequence to Alfred Hitchcock’s Spellbound (1945) (Thomas, 1998).

La Tentation de Saint Antoine, Salvador Dali
Questions for discussion:
o How do you feel about Salvador Dali’s paintings?
(confused, angry, happy, etc.)
o Do you consider his work to be creative? Why?
o What do you think Salvador Dali’s reasons were for painting these images?
Lesson Idea:
1. Class research and discussion.
As a class research and discuss Surrealism and Salvador Dali’s paintings. What are some of the characteristics of surrealism? What are some of the images Dali used to create a surrealistic painting?
2. Writing exercise.
Have the students write a paragraph about a recent dream they had. What images would they use to describe that dream in a painting?
3. Studio activity.
As a class, search through magazines to find images for a collage that will represent their writing exercise. Remind the students that the images that are cut out can be combined with other images to create a new form. After they’ve chosen their images, have them draw a landscape to place them in. When the landscape is drawn, then glue the images down.
Concluding Activity:
Discuss the activity as a class. Have the class discuss what they learned about Salvador Dali and Surrealism. Have the class share their written exercise and discuss how they related the paragraph to their collage. How does there collage represent their dream? Does the collage depict characteristics of Surrealism? How?
References:
White , Kathy (2005). Biography. Retrieved April 12, 2009, from Dalí Museum Web site: http://www.salvadordalimuseum.org/history/biography.html
Thomas, Jean-Jacques (1998). Salvador dalí biography. Retrieved April 12, 2009, from Surrealism Website: http://www.duke.edu/web/lit132/dalibio.html
Voorhies, James (2000). Surrealism. Retrieved April 12, 2009, from The Metropolitan Museum Website: http://www.metmuseum.org/toah/hd/surr/hd_surr.htm
Sunday, October 11, 2009
Sense of Place

Our First Home
Rebecca D'Angeli
Construction paper, pastels
I decided on my home because it is our first home as a married couple. We've torn down and built up rooms to make it more for us. I added a tree because we have a few trees surrounding our home, and it is indeed the first home I've lived in that has trees and grass. I made the sky at night because I feel more at home, because it is a time to spend with my husband (dinner, watching our favorite shows, etc).
For the Sense of Place Silhouette project I decided for a lesson that would be personal and interesting would be to base it off of home surroundings. I feel students can take this idea to many different levels and have fun with it. They can also incorporate magazine images, photographs, as well as mixed media. It could obviously be adapted to any students character, whether they choose to be more reserved like I have, or to be intimate.
Saturday, October 10, 2009
Silhouette Lesson Plan
Instructor: Rebecca D’Angeli
Title: Silhouettes of Home
Grade: 7th
Brief History/ Background: A silhouette is an outline of an image that has no features or details. Usually the silhouetted object is black to describe the shape of a person’s body or other pictorial representations. It dates back to the 18th century when portraits were made out of cut black paper. In this lesson, students will be creating their idea of home using silhouetted imagery.
Standards:
PA Standards:
-9.1.7. - A. Know and use elements and principles to create works of art.
-9.1.7. - B. Recognize, know, use, and demonstrate art elements and principles to produce artwork.
-9.1.7. - C. Identify and use comprehensive vocabulary within each of the art forms.
-9.1.7. – E. Demonstrate the ability to define objects, express emotions, illustrate an action or relate an experience through creation of works in the arts.
-9.2.7. - A. Explain the historical, cultural, and social context of an individual work in the arts.
-9.3.7. - A. Recognize critical processes used in the examination of works in the arts.
NETS:
1. A. – Promote, support, and model creative and innovative thinking and inventiveness.
1. C. - Promote student reflection using collaborative tools to reveal and clarify students’ conceptual understanding and thinking, planning, and creative process.
Goal: To create a silhouette of home.
Objectives: Student’s will:
1. Discuss the history of silhouettes.
2. Reflect on the idea of home and what it means to them.
3. Create an image of their idea of home using silhouettes.
Resource Materials/ Visual Aids:
- Images of silhouettes throughout history
- Exemplar of project
- Karl Johnson
- Silhouettes
- Art Therapy
Supplies/ Materials:
- Construction paper (have plenty black and various colors)
- Bristol board (11” x 14”)
- Scissors
- Oil pastels
- Glue
Teacher Preparation: Gather images of silhouettes throughout history and place somewhere in the room where all students can clearly see. Create exemplar so students will better understand the end product. Have plenty of supplies so each student will have a sufficient amount to create their image.
Teaching/ Introduction: Begin class by asking if anyone knows what a silhouette is? What were they used for in history? Then show images of silhouettes found throughout history and how/ what they were used for. Have the class discuss other ways of using silhouettes as an art form. Ask them to think about what Home means to them. Then explain they will be creating an image of their ideas of Home using silhouettes.
Directions:
1. Have students reflect, “What home means to them.”
2. List ideas that will be present in their image.
3. Have student’s choose one idea that will become the silhouette and main focus of composition.
4. Pass out materials.
5. Using the black paper, have students trace the main subject that will be the silhouette.
6. Put aside.
7. Draw the background on Bristol board using oil pastels.
8. Students have the option of cutting or ripping other colors or construction paper to add onto their background. (i.e. ripping pieces of blue paper to add onto the sky).
9. Paste silhouette onto image.
10. Set aside to dry.
Critique/ Evaluation/ Assessment: Ask students to explain their images of home. What did they find most important? Why did they choose to silhouette certain subjects?
Time Budget:
- 10 minutes introduction
- 25 minutes work time
- 5 minutes clean up
- 5 minutes critique
Vocabulary:
Silhouette- a view of an object or scene made up of an outline and a featureless interior with the object being all black.
Safety concerns:
- Proper handling of scissors
Friday, October 9, 2009
eLecture: Gustav Klimt and his “Golden Phase”

Gustav Klimt was a Symbolist painter and his “Golden Phase” was extremely successful. In Klimt’s “Golden Phase,” he used gold leaf to create an elegant ornamentation in his paintings. The most popularly associated with this period are the The Kiss and a series of portraits of fashionable Austrian matrons such as Fritza Riedler and Adele Bloch-Bauer. In these works he painted the figure without shadow and incorporated areas of flat, highly patterned areas of decoration to heighten the compositions.
What is Gold Leaf?
Since gold is an element, it can be compressed so thinly that sunlight can pass through. It can be done without destroying its structure. This property of gold is essential to the creation of gold leaf. In history, craftsmen would create gold leaf by pounding gold in between two leather straps for weeks or months until the gold became so thin that it was applied to paintings, sculptures, and religious or royal relics.
The present way of creating gold leaf involves metal rollers that compress gold to an extreme thin sheet. Then it can be cut into smaller sheets and placed in between layers of glassine paper. This is how it is sold in craft and art supply stores.
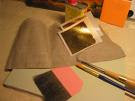
Gold Leaf Materials
How to use gold leaf like Klimt
In order to achieve the luminosity that Klimt was able to using gold leaf, you must first understand that there are many steps and a lot of patience involved. Preparing involves building up the surface by applying several layers of gesso. Next bole is applied to the surface that is to be gilded. The bole is a mixture of clay and water that becomes an adhesive for the gold leaf. Water must be on the surface of the bole while the gold leaf is applied, the artist must work quickly.
Discussion
What is gold leaf and what ways can it be used in a painting?
How did Klimt use gold lead in his paintings?
What effects does gold leaf create in art?
What other periods in art history was gold leaf used?
Activity; Gold Leaf Self-Portraits
 Adele Bloch- Bauer I
Students will be creating a self-portrait using gold leaf in the background. However, since water gilding can become expensive, students will be applying gold leaf with an adhesive.
Materials:
Sheets of gold leaf
Gold leaf adhesive
Canvas
Acrylic paints
Paintbrushes for acrylics
Natural bristle paintbrush for gold leaf
Directions
- Discuss Gustav Klimt’s The Kiss and the portrait of Adele Bloch-Bauer
- Have students paint a self-portrait using acrylic paints leaving the background blank.
How to apply gold leaf;
1. Remove dust from the canvas surface using a clean dry cloth
2. Lay the painting on a flat surface
3. Apply a thin layer of gold leaf adhesive to the area you want to apply the gold leaf
4. Wait 10 to 15 minutes for the adhesive to become tacky
5. Gently pick up gold leaf and apply to the painting using a stick by carefully separating the leafing from the paper. You really shouldn’t overlap gold leaf but minor overlapping is acceptable.
6. When gold leaf has been applied to the painting, use a small natural bristle brush to sweep over the areas. This is to remove any excess gold leafing that was applied. Remember to brush very lightly or the gold leaf can be removed or it can shift.
7. Allow the gold leaf to dry completely. Apply a glaze to seal the painting and hold the gold leaf in place.
What is Gold Leaf?
Since gold is an element, it can be compressed so thinly that sunlight can pass through. It can be done without destroying its structure. This property of gold is essential to the creation of gold leaf. In history, craftsmen would create gold leaf by pounding gold in between two leather straps for weeks or months until the gold became so thin that it was applied to paintings, sculptures, and religious or royal relics.
The present way of creating gold leaf involves metal rollers that compress gold to an extreme thin sheet. Then it can be cut into smaller sheets and placed in between layers of glassine paper. This is how it is sold in craft and art supply stores.

Gold Leaf Materials
How to use gold leaf like Klimt
In order to achieve the luminosity that Klimt was able to using gold leaf, you must first understand that there are many steps and a lot of patience involved. Preparing involves building up the surface by applying several layers of gesso. Next bole is applied to the surface that is to be gilded. The bole is a mixture of clay and water that becomes an adhesive for the gold leaf. Water must be on the surface of the bole while the gold leaf is applied, the artist must work quickly.
Discussion
What is gold leaf and what ways can it be used in a painting?
How did Klimt use gold lead in his paintings?
What effects does gold leaf create in art?
What other periods in art history was gold leaf used?
Activity; Gold Leaf Self-Portraits
 Adele Bloch- Bauer I
Students will be creating a self-portrait using gold leaf in the background. However, since water gilding can become expensive, students will be applying gold leaf with an adhesive.
Materials:
Sheets of gold leaf
Gold leaf adhesive
Canvas
Acrylic paints
Paintbrushes for acrylics
Natural bristle paintbrush for gold leaf
Directions
- Discuss Gustav Klimt’s The Kiss and the portrait of Adele Bloch-Bauer
- Have students paint a self-portrait using acrylic paints leaving the background blank.
How to apply gold leaf;
1. Remove dust from the canvas surface using a clean dry cloth
2. Lay the painting on a flat surface
3. Apply a thin layer of gold leaf adhesive to the area you want to apply the gold leaf
4. Wait 10 to 15 minutes for the adhesive to become tacky
5. Gently pick up gold leaf and apply to the painting using a stick by carefully separating the leafing from the paper. You really shouldn’t overlap gold leaf but minor overlapping is acceptable.
6. When gold leaf has been applied to the painting, use a small natural bristle brush to sweep over the areas. This is to remove any excess gold leafing that was applied. Remember to brush very lightly or the gold leaf can be removed or it can shift.
7. Allow the gold leaf to dry completely. Apply a glaze to seal the painting and hold the gold leaf in place.
Subscribe to:
Posts (Atom)